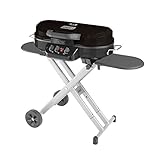
You cannot have a real road trip without preparing something on the grill. For as long as I can remember, my favorite trips have been the ones where I, my friends, and my family gather around the grill for some quality time. I have a lot of great memories like that, but it is also helpful that we have had the Coleman Roadtrip Grill for all those trips.
This grill from Coleman is one of the best grills on the market. It is so convenient and easy to use, while you can also transport it without any problem. After you use the grill, you will be able to clean it without any problem because it is made from great materials that do not collect that much dirt.
To put that aside, I have to say that regular cleaning and maintenance of the grill is vital. Whether you have the Coleman Roadtrip or not, you need to clean your grill before and after each use.
To learn how to do that, go over my detailed step-by-step guide below. I do not doubt that you will be able to make your grill spotless if you read the entire thing!
More...

Table of Contents
How Do I Clean a Coleman Roadtrip Grill? Step-By-Step Guide
As I mentioned before, the Coleman Roadtrip Grill is not that difficult to clean. The only thing that you need to keep in mind is that you need to clean it before and after each grilling session. Cleaning the grill regularly will increase the grill’s longevity and preserve the quality.
But that is not all. With frequent cleaning, you can also make it heat up faster. The food you will cook will be of excellent quality as no residue or dirt will make its way from the grates. So, it is a win-win situation either way!
If all this convinced you to give your grill a thorough cleanup, I would like to tell you exactly what to do. Follow my steps to make your grill spotless before and after using it.
- GRILLING POWER: Up to 20,000 total BTUs.Grill Burners : 3. Stove Wind Block : No
- 3 ADJUSTABLE BURNERS: With improved burner technology for more precise temperature control
- LARGE GRILLING AREA: 285 sq. inches

- 【The Safest Bristle Free Grill Cleaner】:No wire bristles at all, no melting like nylon grill brushes; With this safe grill brush and scraper, your food will stay 100% Bristle Free. No more worry...
- 【The Cleaning Helper - with a Wide Scraper】: You'll be surprised by the efficiency of a grill scraper. You may Strong scrape and clean more areas in less time. This grill cleaning brush build in a...
- 【Upgraded for All Grill Types】: 125% more flexible upgraded helix can easily reach and clean the Hard-to-Clean sides of grates, not just the front. Whether you have a gas, charcoal, smoker,...
Before Using It
It is important to clean the grill before using it because it might have accumulated some dust and dirt while sitting in storage. Also, if you are transporting it, chances are that it will get dirty during the process.
This means that you should give the grill a short wiping with a wet cloth. At this point, you do not need to use any harsh cleaning solutions, especially if the larger debris has already been cleaned.
Remember that you need to wipe the grill dry before using it. You can also use a paper towel to rub some cooking oil or non-stick cooking spray on the grate after cleaning it. This will help get the grate ready for the grilling!
After Using It
After using the grill, you will need to spend a bit more time cleaning all the parts. The grilling process can be messy. There can be a lot of debris and excess oil on the grill. So, make sure that you clean everything before storing the grill.
Also, wait for the grill to cool down before you clean it or you risk burning your hands. It is a good idea to disassemble everything, starting with the propane tank. That way, you will access all parts without any problem and clean them to perfection.
Step 1 – Clean the grate
The grate is one of those parts that becomes the messiest after a grilling process. To clean the extra grease from the grate, you need a clean cloth and some dish soap mixed with warm water. No need to use any abrasive cleaners – if you clean it right, even the regular dish soap will do the trick!
If you find it difficult to remove all the dirt, you can also use a pressure washer or a dishwasher to clean the grate. Also, consider repeating the cleaning process a few times to clean everything from the grate.
Step 2 – Clean the housing
When it comes to the grill housing, you might find some food residue, food particles, or oil that you need to clean. Like you did with the grate before this, you can use soapy water and a cloth to remove everything from the housing.
If any parts are hard to reach or located in a tighter space, consider using a cotton swab to clean them. Make sure that you are very thorough – leaving dirt behind will cause the grill to adopt a bad smell.
If you find that the housing is too big and hard to clean, consider putting the grill in your backyard and cleaning it with a garden hose. That way, you will be able to do the entire process so much faster!
Step 3 – Clean the burners
The burners also deserve some thorough cleaning. After cleaning the debris on the outer parts, you need to go and get the stubborn debris from the interior side and the ports. You can use a special grill brush or a venturi brush for that purpose.
You must place the burners back where they belong and make sure they are adjusted in their spot. Otherwise, you might start facing some problems with the grill.
Step 4 – Clean the drip tray
For the tray, you need a plastic scraper, a cloth, and some mild soap to remove the oil and debris. The tray is one of the easiest things to clean, so I do not think you will have any difficulties with it.
Step 5 – Clean the exterior
Finally, you need to clean the exterior because it can accumulate a lot of dirt and dust, especially if you use the grill outdoors. Routine cleaning of the exterior will include a thorough wiping of the grill.
After doing all this, you should use a clean cloth to dry everything. Then, you can assemble the grill and put it in storage. The next time you need to use it, you can repeat all these steps to ensure that the grill stays in good condition.

Is Coleman Roadtrip Grill Dishwasher Safe?
When it comes to the Coleman Roadtrip Grill, I can tell you with certainty that the grate is a part that you can clean in the dishwasher. It is safe to clean it using such a machine. At the same time, you can consider adding the drip tray in there as well.
If you are not sure whether the parts of your grill are suitable for machine washing, you can check the manual that comes with the grill. That is the safest practice as the manual will tell you how to clean the parts and what to use for the purpose.
Wrap-Up
Various Coleman grill users have reported that the Coleman Roadtrip Grill is the best at making great grill anytime and anywhere. After cooking the food, remember to clean the grill using the guide given above.
Thank you for sticking with me through this guide. If you have any experience with this grill or you know about other great grills, share the information with me in the comments below. I cannot wait to read all about it!

I hope that you enjoy this site and find it inspiring and who knows, maybe we’ll bump into each other on a campsite somewhere in the wilderness and share a story or two.
- Are Merrell Shoes Good? – An Unbiased Review of Merrell Footwear - December 9, 2023
- Where Are Merrell Shoes Made? - December 9, 2023
- Camping in 40-degree Weather: Tips and Tricks - September 25, 2023
![How to Clean Teva Sandals? [Step-By-Step Process]](https://grandcircletrails.com/wp-content/uploads/2022/05/How-to-Clean-Teva-Sandals-150x150.jpg "How to Clean Teva Sandals? [Step-By-Step Process]")
![How to Hang a Hammock on a Balcony? [Step-by-Step Guide]](https://grandcircletrails.com/wp-content/uploads/2021/09/hammock-on-the-balcony-1-150x150.jpg "How to Hang a Hammock on a Balcony? [Step-by-Step Guide]")


