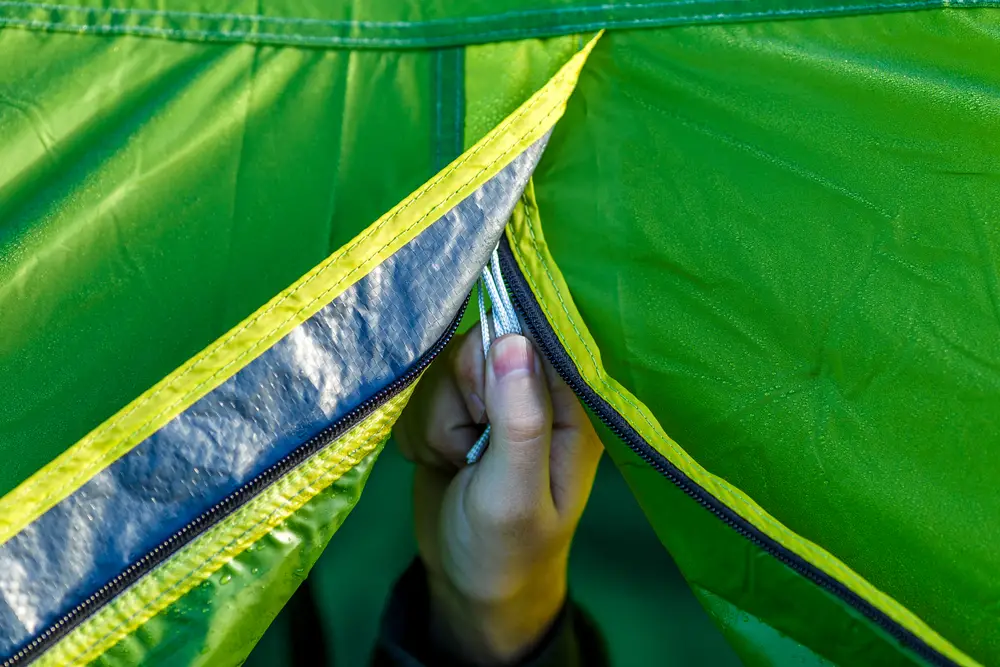
There are two popular ways that you can repair your tent's zipper. You can use a repair kit that is widely available and easy to purchase, or you can repair the zipper without a kit.
We shall look at both options today to help you pick the right method for you and get your zipper fixed!

Table of Contents
Fixing your zipper with a repair kit:
When repairing your tent zipper, the first step is to select the best repair kit for you and your needs.
Generally, a good zipper repair kit will contain multiple sized sliders, a needle and thread, and a seam ripper. Repair kits are affordable and compact so that you can take them on your camping trip!
You may need additional pliers; adjustable ones are handy to have both for repairing zips and camping in general.
Before we get into how to use your repair kit, let’s look at some of the common faults we see on tent zippers.
Your zipper might separate at one or both ends or have openings after sealing, providing access into your tent. Your zipper may also come undone after zipping it closed.
These problems are associated with the slider rather than the track and can be fixed by your repair kit.
However, if your zipper gets stuck when you are closing it or won’t move past a certain point, you may have issues with the track.
It is unlikely that you can repair these with your repair kit, and you may need to seek a tailor’s help. Before that, scroll down to see if our tips on repairing your zipper without a kit can be used!
Once you have got your repair kit, we can get to work. Most tents will have a sewn-in stop, which keeps the zipper from opening at the end.
Use your pliers to remove the seam before working if your zipper stops at the end of the track.
Once removed, pull the slider off and set it to one side, be sure to store it somewhere safe! You can use your pliers to remove the slider if need be. Be sure to do this gently to avoid any further damage.
Next, replace the slider with a new one and slide it onto the grooves of the track. Make sure the zipper pull is facing the inside of the tent as you do this.
You may need to push the hem’s fabric through the slide; you can use a pin to do this. Be sure that the nose or pointed part of the zipper is installed first so that the zipper works.
Once attached, pull the slider until roughly 2-3 inches of the locked zipper is seen. This will show you that the repair is working.
If your kit comes with a range of slider sizes, you can use a different one if you run into any issues.
Generally, tents use a medium-sized zipper, although you can test other sizes to find the right one for you. This can be a process of trial and error until your zipper is working correctly.
Next, using the needle and thread in your kit, you can resew the stopper seam where the tent’s track and fabric meet. Doing this will secure the bottom of the zipper and stop the slider from coming off the track.
It generally takes 15-20 stitches, and they don’t need to be perfect. You will need to make sure no thread gets in the track or the slider, as this can cause further problems!
Check the track is secure by gently tugging on the zipper once your sewing is done.
Fixing your zipper without a kit:
To repair your zipper without a repair kit, you will first need to slide a zip tie through the opening.
This will act as a DIY pull and allow you to slide the pointed end of the zip through the eye of the zipper. Place the fastener over the cord and pull to tighten. Ideally, you want to have a 1-inch loop.
If the track is separating, you will need to bend the slider into place. To do this, unzip the opening to place the slider at the end of the zipper.
Ensure that the zipper is open and not secured, as you will need to access the slider from both sides.
Using pliers, place the nose parallel to the track of the zipper on the left side. Squeeze to apply some pressure; this will flatten the slider on that side.
Be sure not to squeeze too hard; you don’t want to break the slider or jam it.
Next, repeat this action on the right side of the slider. Again, be sure not to apply too much pressure to the slider.
Once this is complete, you can run a pencil along the outside of the zipper’s teeth. Doing this will leave graphite on the teeth, helping the slider run quickly and smoothly along with the teeth.
This step will help avoid lagging in the zip, which can be an issue on all zippers, not just your tents!
If your zipper is still stuck, check along the track and teeth for any trapped fabric that may be stuck.
You will need to remove any material stuck to allow your zipper to work correctly. This is delicate work, so you will need to take care.
Be sure to work slowly, pulling firmly on any fabric to remove it. You can use a fabric needle to push the fabric through the teeth or slider if you are struggling.
If the fabric is still stuck, you can cut a small area under the area attached to the zipper. It will separate the stuck piece from the rest of the tent and allow you to slide the zipper over the track.
You can also use a wet bar of soap to remove the fabric. Apply the soap generously and pull the fabric gently until it comes out. This step can take time so remember to be patient!
If you notice any damaged or missing teeth on a zipper, you can ask a professional to fix this.
Tailors are often able to repair or replace the teeth of the zipper for you. This is usually cheaper than purchasing a new tent, but it is always worth considering purchasing a new tent if there are other wear and tear.
Final word
As you can see, fixing your tent’s zipper is possible! It can be a little fiddly, and patience will be needed, but if it saves you the cost of a new tent, we think it's worth it!
Remember to check out tutorials online if you are unsure, and follow the instructions above to restore working order to your zipper!
- Are Merrell Shoes Good? – An Unbiased Review of Merrell Footwear - December 9, 2023
- Where Are Merrell Shoes Made? - December 9, 2023
- Camping in 40-degree Weather: Tips and Tricks - September 25, 2023


![How to Dry Tent after Rain? – 2 Proven Methods [Explained] How to Dry Tent after Rain? – 2 Proven Methods [Explained]](https://grandcircletrails.com/wp-content/uploads/2021/08/How-to-Dry-Tent-after-Rain-1-150x150.jpg)
